
How to post a Event Listing Ad: Step-by-Step Instructions
STEP 1 Create an Account, it’s Free!
Click here to get started
IMPORTANT! Make sure you are not already listed with us before you making a new account (Search our Site)
ALREADY HAVE AN ACCOUNT?
Click here to Login to your member admin.
Forgot your username or password?
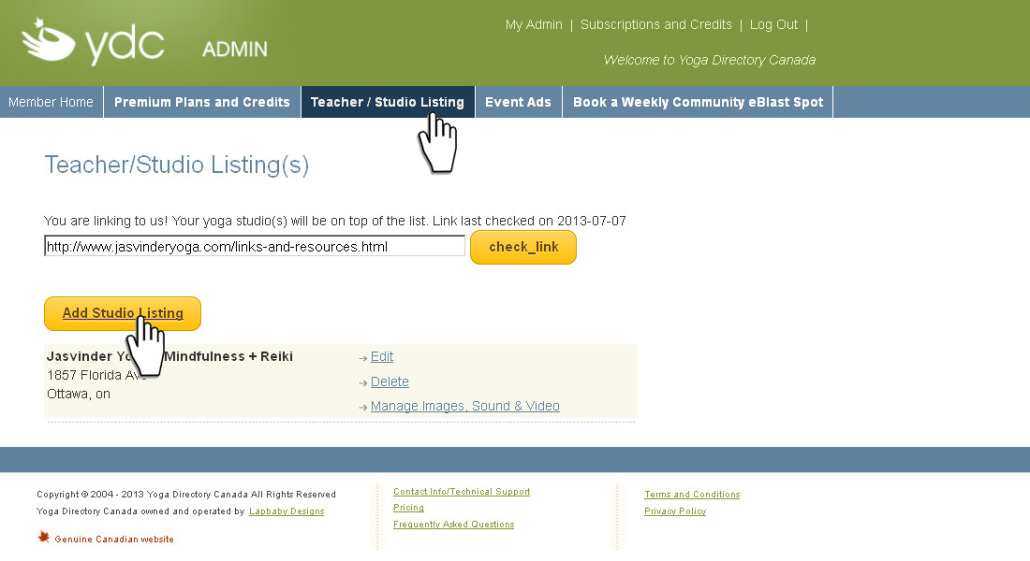
STEP 2 Create a Member Listing!
This is an important step. This info will be posted on our site under the Studios and Teachers Section. It’s like the Yellow Pages for the Canadian Yoga Community.
- Go to the the “Studios / Teachers Link” Page
- Click the “Yellow Button “add Studio Listing”
- Follow the steps that follow to complete your Yoga Listing
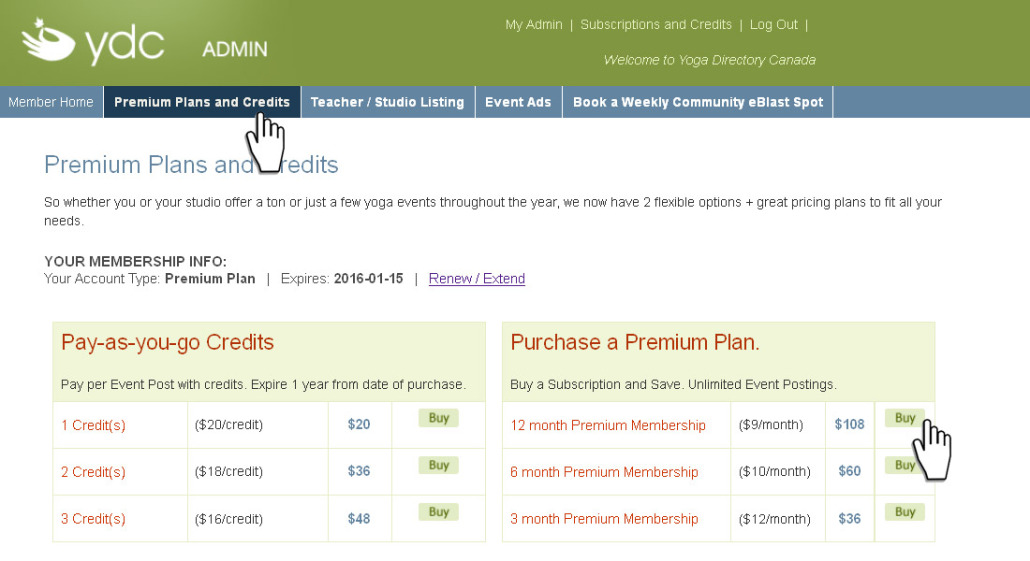
STEP 3 Purchase a Premium Plan or Credits
Plan on posting Lots of Event Listings on our site? Then we suggest going with one of our Premium Plans.
Plan on posting only a few Event Listings? Then we suggest going with the Pay-as-you-go Credits.
- Click on the corresponding “BUY” button for the Premium or credit package you would like to purchase.
- You will then be redirected to PayPal’s website to complete the purchase.
- Simply follow their steps to do so.
- Once the transaction is complete PayPal will redirected you back to our site and your credits or the premium subscription will be automatically banked in to your account.
- It’s that simple!
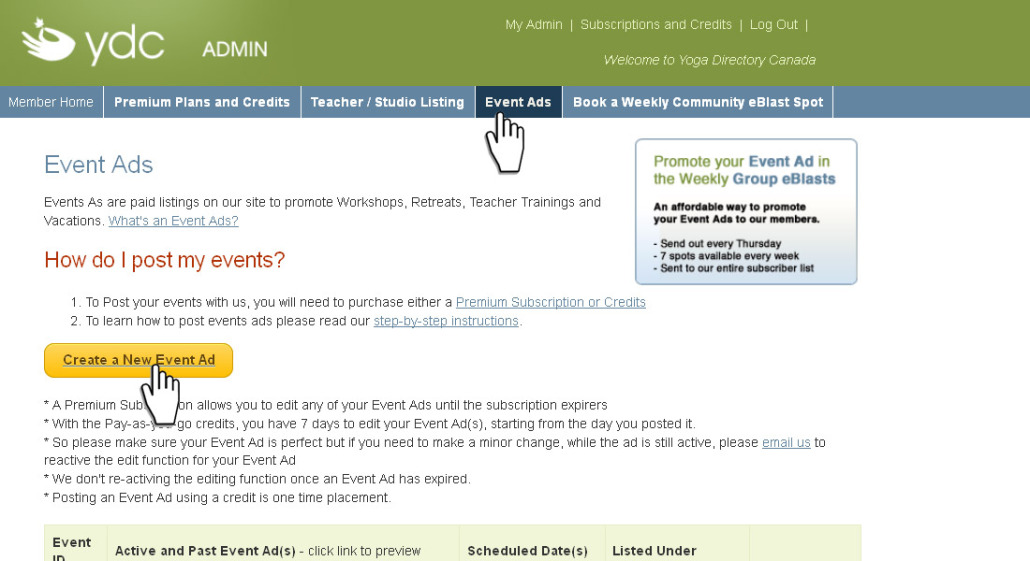
STEP 4 Posting your Event Listing
Now you have your have some credits or the Premium Plan you are ready to start creating your Event Ad(s).
- Go to the Event Listing link on the main menu.
- Click on the Yellow Button “Create Event Listing” link.
- A The Event Listing Form Page will open.
Use the online form to enter your events info and add your photo. Before you click “Submit” verify the information and dates you have entered to make sure it is all to your liking. {If you have credits, once you click submit, 1 credit will be deducted from your account at this time and you will be redirected back to the Event Listings page}. If there was an error the form page will come up again with a yellow message box with instructions on what needs to be fixed.
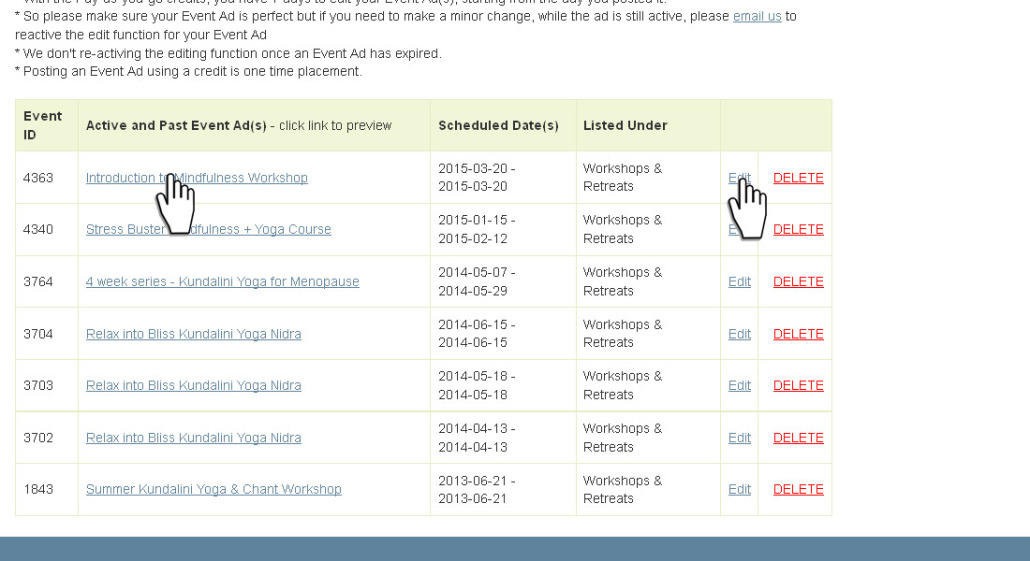
Step 5 To Preview and Edit your Yoga Listing
To Preview: Click on the Event Listing’s “Title Link” in the Event Listing table. A pop-up Window will open displaying your Event Listing.
To Edit: Click on the “Edit Link”. The Form Page will open. Go ahead and edit the areas needed, click submit and your A will be updated.
Please note:
- A Premium Subscription allows you to edit all your events at anytime.
- With the Pay-as-you-go credits, you have 7 days to edit your ad(s), starting from the day you posted it.
- After that if you need to edit it please email us to request reactivation of the edit function for any of your Event Listings.
- We only offer this reactivation on Active Event Listings, not if they’ve expired.
How long does my Event Listing(s) stay up on the site?
For multi-day events they expire 3 days after their scheduled start date, for single day events, they expire the next day OR when your premium plan expires unless you renew prior to it’s expiration date.
So for example, if you create an Event Listing on January 10 with a start date as May 10. Your Event Listing will stay up on the site until May 13. That would give you 4 months of advertising.
We always feel that it’s always more effective to posts your Event Listings early so you can benefit from our online and email exposure.


